Launch unlimited on-demand stores.
Never touch an order.
On-demand stores, wholesale pricing, and orders routed automatically to fulfillment partners. Built specifically for distributors and decorators.
Trusted by 500+ distributors and decorators
The growth paradox
More stores should mean more revenue. Not more work.
Most distributors hit a ceiling — not because they run out of clients, but because every new store adds more admin: order routing, artwork chasing, fulfillment coordination. The work scales linearly. The revenue doesn’t.
Why Brikl
Three things that make Brikl different.

01 — Marketplace
7,500+
The largest on-demand promo marketplace
Browse decorated products from 180+ wholesale brands at real-time cost pricing. Find the right items faster from a vast product selection, saving time and simplifying sourcing.
Explore the catalog→
02 — Speed
2 min
Stores built in minutes, not months
Pick products, upload logos, set pricing, and publish. Take advantage of advanced design tools and powerful bulk-editing features that help you launch stores faster.
See all features→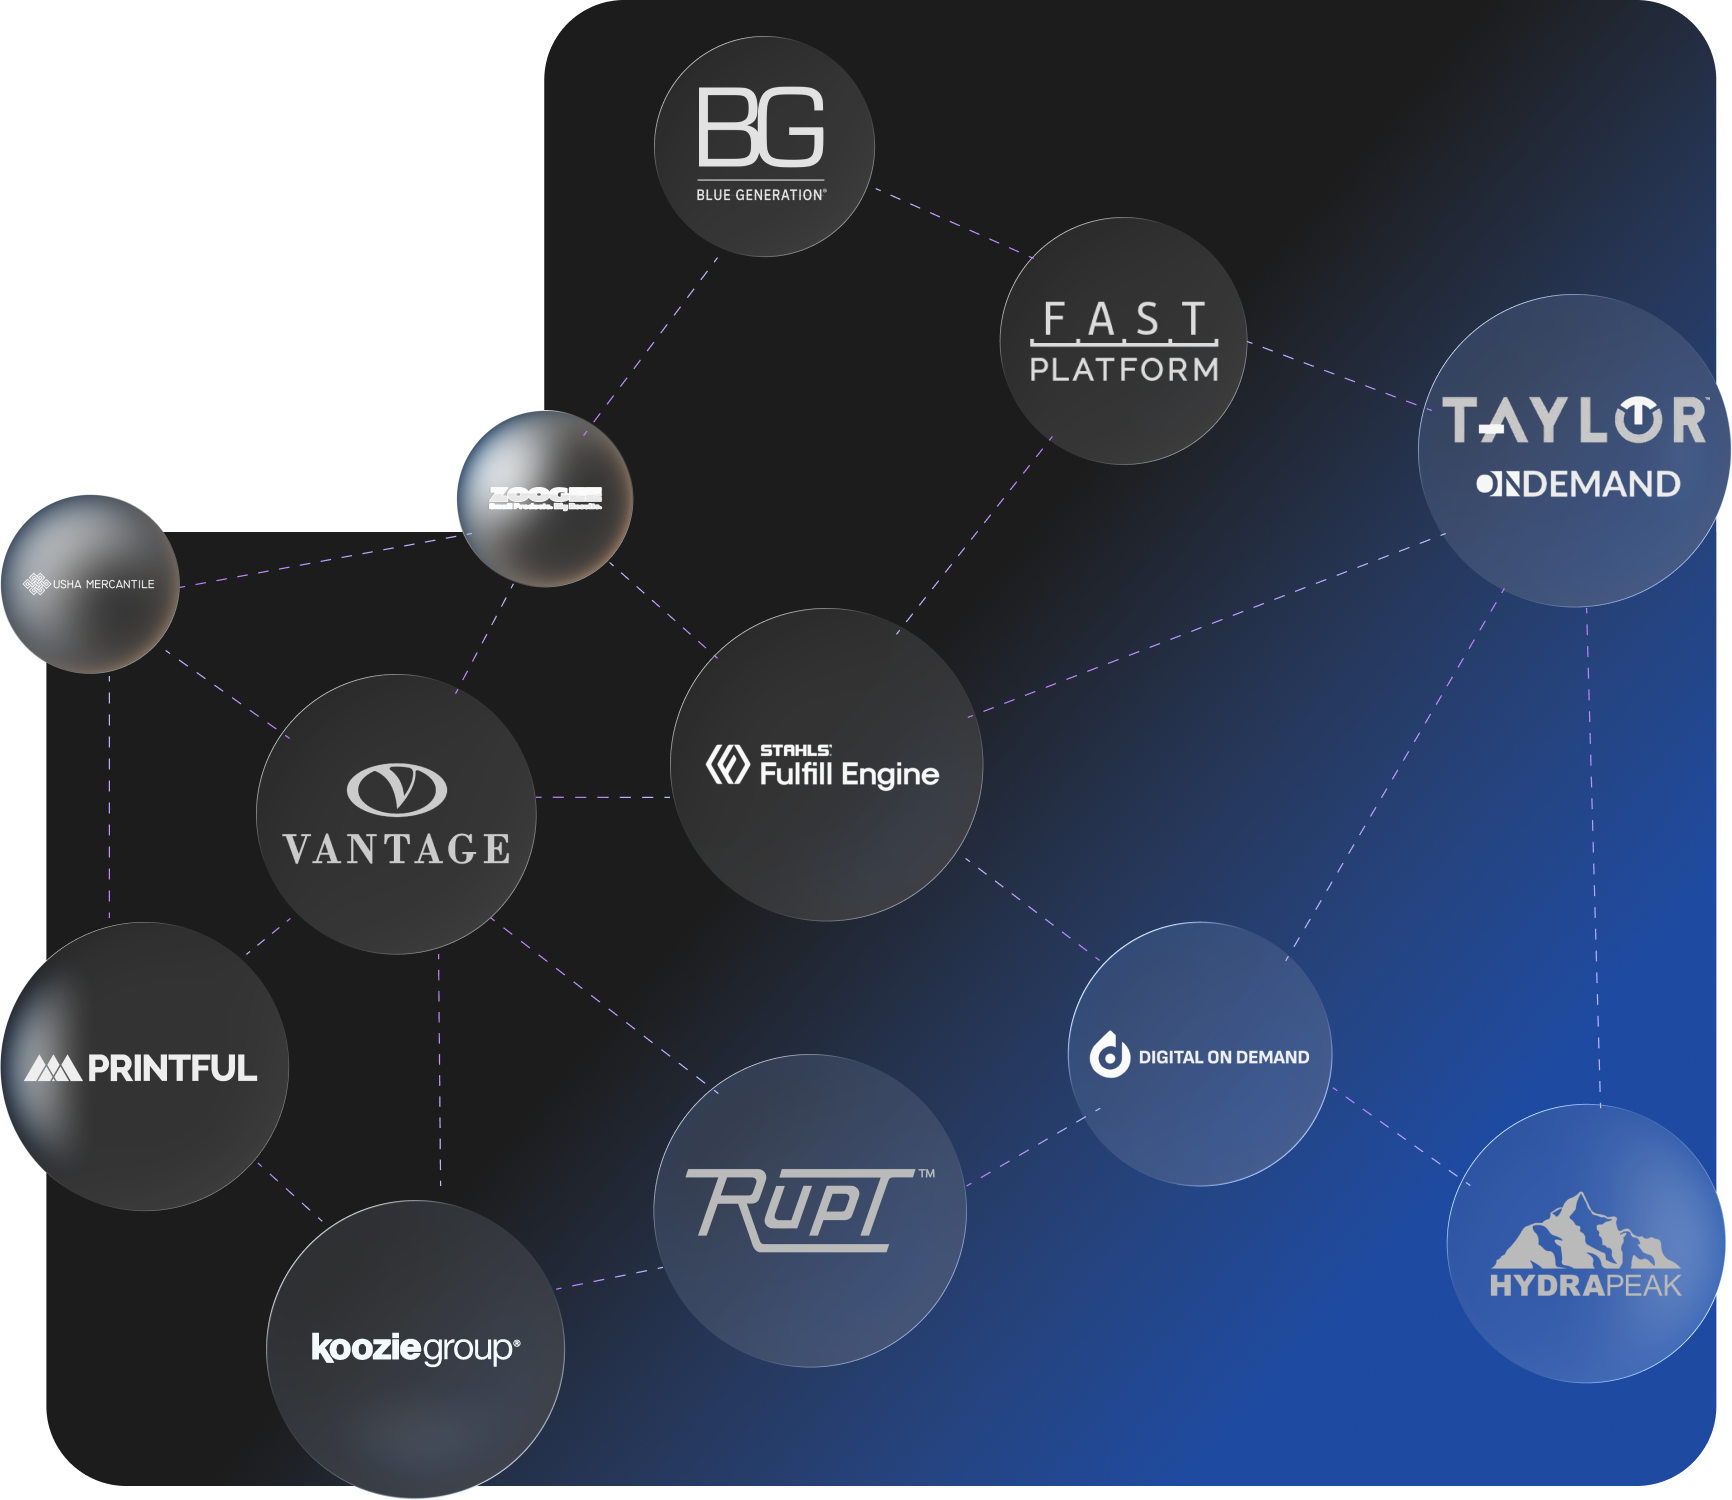
03 — Automation
Auto-fulfillment
Orders fulfilled without you touching them
Every order routes automatically to the right decorator with production-ready artwork. No emails, no POs, no manual QC — so the work doesn’t grow with every new store.
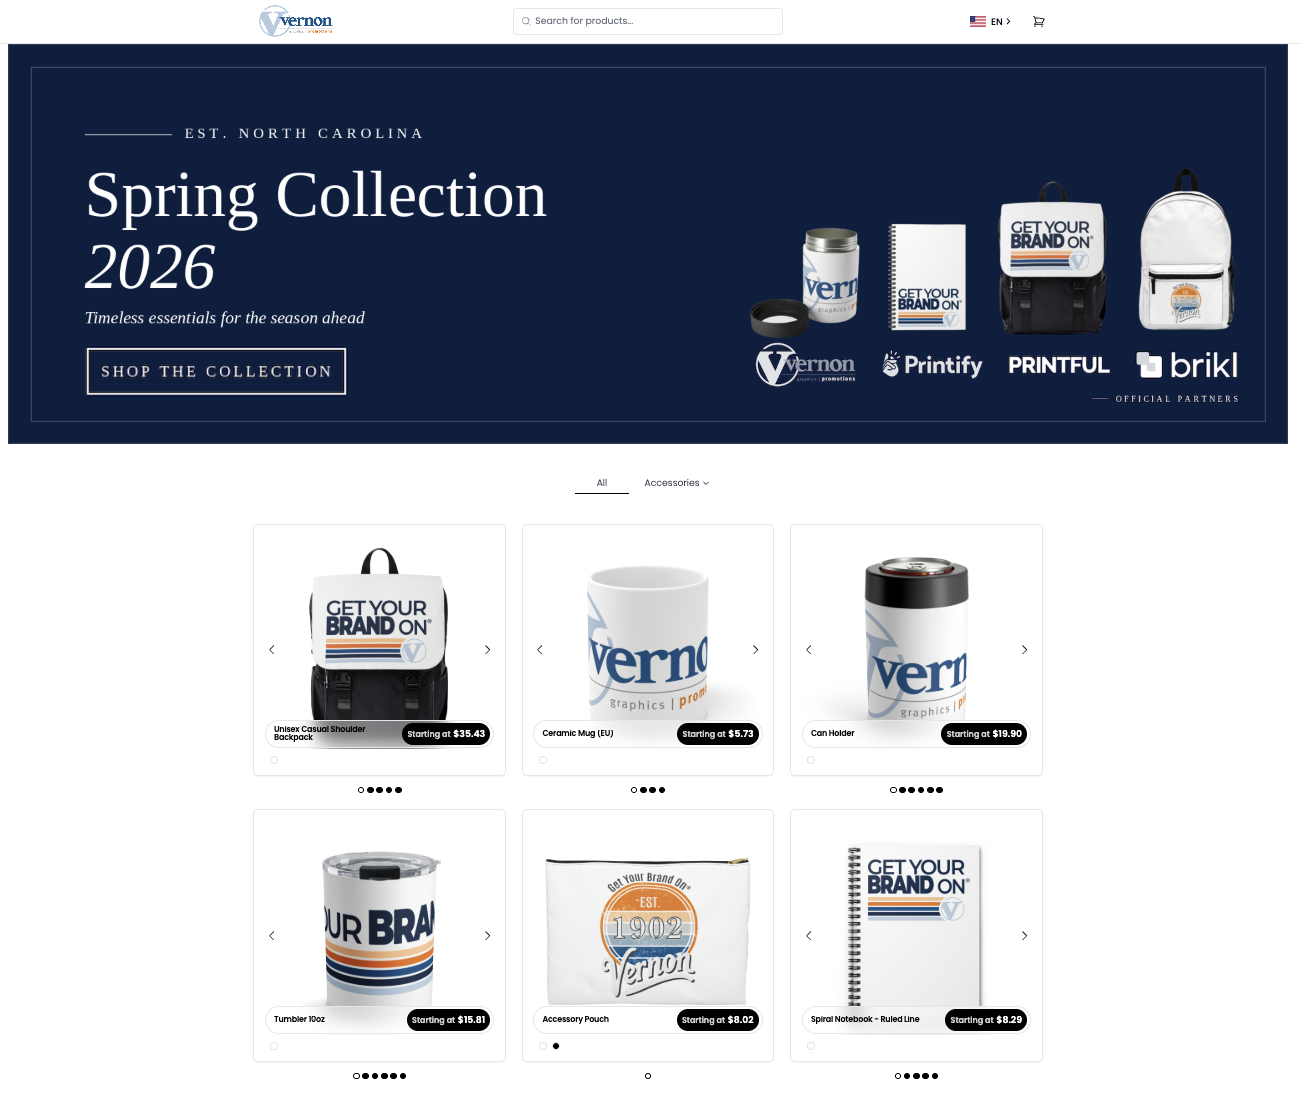
See our partners→220 account executives. One platform. Zero email-based order intake.
The Vernon Company — PPAI Counselor #28, one of the oldest distributors in the industry — migrated its on-demand program to Brikl and rolled it out to 220+ Sales Reps.
“We launched a healthcare client store last month and within just over a week, sales were seeing a boost. The turnaround time and quality have been excellent and the automation frees me to focus on new opportunities.”
JS
John Sease · Account Executive, The Vernon Company
How it works
From store setup to delivered product in four steps.
1
Build a store in minutes
Pick products from the marketplace, upload your client's logo, set your markup, and publish to a branded URL.
2
Customers personalize & order
Customers select color, size, and logo placement, add their name or number, and check out — all on your branded storefront.
3
Orders route automatically
Production-ready artwork is generated at checkout and routed to the right fulfillment partner. No emails, no POs.
4
You get paid
Under the Launch plan, Brikl is Merchant of Record. We handle sales tax, chargebacks, and pay your profit out via Stripe.
7–10 business days— order placed to product at the door, decoration included
Built for the channel
Built for every side of promo commerce.
Distributors
Scale stores without scaling admin.
Build branded merchandise stores for your clients.
Learn more →Decorators
Production-ready orders in your queue.
Art, validated sizes, paid upfront. Receive demand from distributors.
Learn more →Companies
Branded stores with zero inventory.
Onboarding kits, client gifts, franchise merch — all on demand.
Learn more →Teams & Schools
Custom gear without bulk ordering.
Parents and players order directly. Every item produced on demand.
Learn more →Integrations
Works with the supply chain you already know.
Brikl integrates with the suppliers, decorators, and tools you already know — Taylor OnDemand, Printful Enterprise, Fulfill Engine, Koozie Group, Vantage, Rupt, and more.
3.5% commission. Nothing else.
Zero setup fees · No monthly subscription · No per-user charges · Wholesale product access · Auto sales tax filings · Auto profit payouts
We only make money when you do.
See full pricingFrequently Asked Questions
What does Brikl cost?
Nothing upfront — no setup fee, no monthly subscription, no per-seat charge. Brikl takes a 3.5% commission on each transaction. Full details on the pricing page.
Do I need to hold inventory?
No. Every product on Brikl is produced on demand. When an end customer places an order, it routes automatically to a decorator for production and direct shipping. You never touch inventory, never manage stock levels, never deal with leftover product.
What happens when a customer places an order?
Payment is captured at checkout. Brikl generates production-ready artwork automatically, routes the order to the correct fulfillment partner via API, and the product is decorated and shipped directly to the customer. You get a tracking number and a net payout — no emails, no POs, no manual handoff.
Who handles payments, sales tax, and chargebacks?
For stores on the Launch Plan, Brikl acts as the Merchant of Record. We collect payments, calculate and remit sales tax across all U.S. states, and assume chargeback risk. You receive a single net payout, with no invoices to reconcile.
For stores on the Enterprise Plan, you remain the Merchant of Record and are responsible for collecting payments and managing sales tax compliance.
See the Pricing page for full details.
For stores on the Enterprise Plan, you remain the Merchant of Record and are responsible for collecting payments and managing sales tax compliance.
See the Pricing page for full details.
How fast can I get a store live for a client?
A branded store can go live the same day — pick products, upload your client's logo, set your markup, publish. Production turnaround is typically 7–10 business days from order to delivery, depending on the fulfillment partner and decoration method.
Can I use my own decorator?
Yes. You can use Brikl's fulfillment network, add your own products and handle fulfillment yourself, or mix both approaches in the same store.
Can I keep my existing storefront?
Yes. With the Connect API add-on, you can build catalogs on Brikl but run your storefront on a third-party platform. You remain the Merchant of Record and use your own payment gateway.
More questions? Read the full FAQ →
Start selling in minutes.
No credit card. No demo gate. No monthly commitment.
PPAI Member #803362 · SOC 2 Type II Compliant